Step-by-Step Guide: To Spot Cleaning a White Vinyl Fence
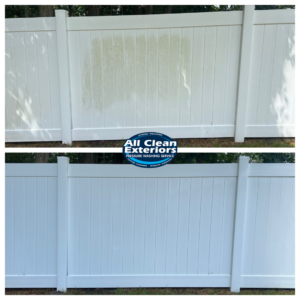
Maintaining the pristine appearance of a white vinyl fence not only enhances the overall aesthetic appeal of your property but also prolongs its lifespan. Regular cleaning is an essential part of this maintenance routine. But what if you just need or want to clean a small section. In this step-by-step guide, we will walk you through the process of effectively spot cleaning your white vinyl fence, ensuring it remains in top-notch condition for years to come.
Step 1: Gather the Necessary Supplies
Before embarking on the spot cleaning process, gather the following supplies:
- Sponge or Micro-fiber Cloth: Opt for a soft sponge with to prevent scratching the vinyl surface.
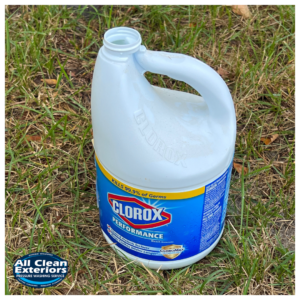
- Bleach: Any bleach will work, even the one in your laundry room.
- Spray Bottle: Grab an old spray bottle or pump sprayer to use with the bleach.
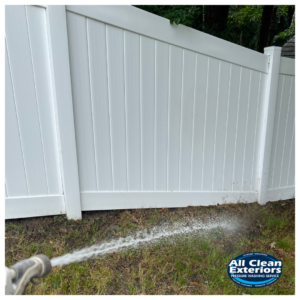
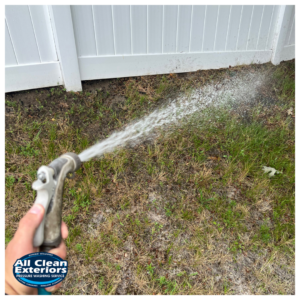
- Garden hose: Keep a garden hose nearby to rinse the ground and fence after cleaning.
Step 2: Preparing the Cleaning Solution
Follow these steps to prepare the cleaning solution:
- Pour the bleach into your spray bottle or pump sprayer.
- If using commercial grade bleach, you can add a little bit of water, about 30% water to 70% bleach. However, if you are using laundry bleach do not add any water.
Step 3: Spot Cleaning Process
Proceed with the spot cleaning process using the following steps:
- Spray the ground around the fence with water. (This prevents the bleach from damaging any grass or plants).
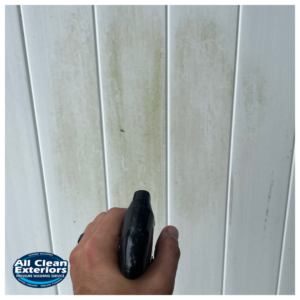
- Spray the bleach onto the dirty spots on the fence. For challenging stains, allow the soapy solution to sit on the surface for a few minutes before scrubbing.
- Rinse the cleaned areas with a garden hose, starting from the top and working your way down. Ensure all soap residue is thoroughly rinsed off.

- Spray the ground around the fence again with water.
- Inspect the fence for any remaining stains. If necessary, repeat the cleaning process until the desired cleanliness is achieved. Is stain is stubborn, gently scrub the stained or dirty areas of the vinyl fence using a sponge or micro-fiber cloth.
Step 4: Maintaining the Fence’s Appearance
To maintain the white vinyl fence’s appearance and prevent future stains, consider the following tips:
- Regular cleaning schedule: Establish a routine for spot cleaning your vinyl fence, aiming for monthly or bi-monthly maintenance.
- Promptly address stains: Tackle any stains or marks as soon as you notice them to prevent them from becoming deeply embedded.
- Avoid abrasive tools: Refrain from using abrasive brushes, steel wool, or harsh chemicals that can damage the vinyl surface.
- Remove vegetation: Regularly trim nearby plants and vines to prevent them from leaning on or staining the fence.
- Protect against discoloration: Apply a vinyl fence protectant or UV-resistant coating to shield the material from the sun’s harmful rays, which can cause fading and discoloration.
Conclusion
Spot cleaning a white vinyl fence is a straightforward but crucial task in maintaining its pristine appearance. By following this step-by-step guide, equipped with the right supplies, you can effectively remove stains and grime, ensuring your fence remains an attractive asset to your property. Monmouth County, NJ has very harsh seasons. Remember, regular spot cleaning and proactive maintenance will significantly extend the life and beauty of your white vinyl fence.
If if you don’t have the time or energy to spot clean your white vinyl fence, give us a call.